
Introduction to AngularJS - Adding Pages with ngView
Learn how to add pages to your AngularJS application using ngView.
Jennifer Bland
This is lesson 3 in my Introduction to AngularJS series. You may want to view the other lessons first since this lesson builds off the principals taught in the first two lessons.
In this lesson we will continue to expand our website that we have created for our fictional Mandarin Spa company. We will be adding an order page to our website.
ng-view
ng-view is the directive that Angular uses as a container to switch between views. We will want to switch when people toggle between the Home page which shows our list of services and our order page. Starting with AngularJS 1.2, the ngView directive, and the $route service were moved into a separate module called ngRoute. This module is not included in the angular.js file that we added to our application. To be able to handle routing we will need to add another script file entry in our index.html file to load the angular route. Here is the code that will be added to our index.html file. It is added right after where we load our angular.js script file.
<script type="text/javascript" src="angular-route.js"></script>
Now that we have added the angular route javascript file, to use routes and ngView our application must explicitly declare it as a dependency. Dependencies are declared in the app.js file with our Angular module declaration. Each page is going to have their own controller. We have already created the spaController for the home page that shows a list of services. We now need to add another controller for the order page. Here is the code that you will need to add in the app.js file for this controller.
.controller('OrderController', ['$scope', function($scope) {
  $scope.title = "Order Page";
}])
We will be chaining the description of this controller off the previous description so don't forget to remove the ; at the end of the first controller description. With chaining the end is signified by a semi-colon. If you do not remove it then the description of our new controller will fail. We do not have any data to pass into our new order page controller like we had with the servicesList array in the SpaController. So I am creating a variable called title that will have the value Order Page. Here is the code in our app.js to declare both controllers.
angular.module('SpaApp', ['ngRoute'])
.controller('spaController', function($scope) {
  $scope.servicesList = [
    {service: 'Massage',  price: 90,    available: true  },
    {service: 'Facial',   price: 60,    available: true  },
    {service: 'Manicure', price: 30,    available: true  },
    {service: 'Pedicure', price: 42.50, available: false }
  ];
})

.controller('OrderController', ['$scope', function($scope) {
  $scope.title = "Order Page";
}]);
$routeProvider
Before we start implementing routing in our Angular application, let me give you an overview of what we are going to accomplish. Currently all of our website code is in our index.html file. We are going to pull out all the code that is specific to each page and put them in separate html files. We will have home.html and a order.html file. These files will only contain information that is specific for each page. All the information that is common to each file such as the navigation bar at the top of the screen will remain in our index.html file. In our index.html file we will have a placeholder for our views. Based on what page a person is currently viewing - home or order - the contents of the view will be replaced with the information for that particular page.
Update index.html
To be able to navigate between views we will need to update our index.html to have a menu for navigation between pages. I have updated the navbar in the index.html to have an entry for Home and Order. Here is the code that was added and changed for the navigation in the index.html file.
<nav class="navbar navbar-default">
    <ul class="nav navbar-nav">
      <li><a href="#/"> Home</a></li>
      <li><a href="#Order"> Order</a></li>
    </ul>
</nav>
Creating Order and Home Page
The next step is to have separate files for our home page and order page. These pages will only contain the HTML code that is unique for each page. Remember that all HTML code that these 2 pages share in common will remain in the index.html file. First we will create our main.html file. We will copy all of the HTML code from the index.html file that dealt with displaying services into our main.html file. Here is what our main.html file looks like.
<div class="container-flud text-center" ng-controller="spaController">
<p>Enter your First Name: <input type="text" ng-model="firstName" placeholder="First Name"></p>
<p ng-hide="!firstName">Welcome to Mandarin Spa {{ firstName }}!</p>
</div>
<div class="container-fluid">
<div class="row-fluid"><strong>
<div class="col-md-4"></div>
<div class="col-md-1">Item #</div>
<div class="col-md-1">Service</div>
<div class="col-md-1">Price</div>
<div class="col-md-1">Availability</div>
<div class="col-md-4"> </div></strong>
</div>
<div class="row-fluid" ng-repeat="service in servicesList">
<div class="col-md-4"></div>
<div class="col-md-1" ng-class="{strike: !service.available}">{{$index + 1}}</div>
<div class="col-md-1" ng-class="{strike: !service.available}">{{service.service}}</div>
<div class="col-md-1" ng-class="{strike: !service.available}">{{service.price | currency}}</div>
<div class="col-md-1" ng-class="{strike: !service.available}" ng-if="!service.available">{{"Sold Out"}}</div>
<div class="col-md-4"> </div>
</div>
</div>
I have created an order.html file that only displays the title that was defined in the controller. Here is the contents of the order.html file.
<div ng-controller="OrderController">
  {{title}}
</div>
Displaying Views
Now that we have our home and order pages in their own files, we need a place in our index.html to mark where these views will be displayed. To do this I will add a div with an ng-view directive. This will be the placeholder where the views will be displayed. Here is the contents of my index.html file now that I have removed all HTML code that was specific to the home.html file.
<!DOCTYPE html>
<html lang="en">
  <head>
    <title>My First Angular App</title>
    <link rel="stylesheet" href="https://maxcdn.bootstrapcdn.com/bootstrap/3.3.4/css/bootstrap.min.css">
    <link rel="stylesheet" type="text/css" href="style.css">
  </head>

  <body ng-app="SpaApp">

  <nav class="navbar navbar-default">
    <ul class="nav navbar-nav">
      <li><a href="#/"> Home</a></li>
      <li><a href="#/Order"> Order</a></li>
    </ul>
  </nav>

  <div ng-view></div>

  <script type="text/javascript" src="angular.js"></script>
  <script type="text/javascript" src="app.js"></script>
  <script type="text/javascript" src="angular-route.js"></script>

</body>
</html>
Results
With our changes this is what the application looks like when we click on home in the navigation.  This is what our application looks like when we click on Order in the navigation.
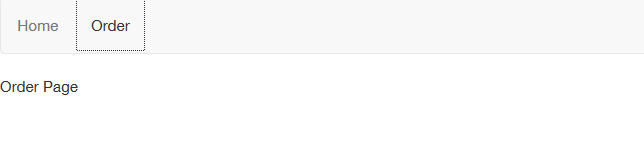
Next Lessons
In the next lesson we will be completing the order form. You can start lesson 4 here.